How Professionals Assess Affected Rooms and Materials
A professional assessment works outward from where an incident happened, room by room and layer by layer, to find every surface and material that biological material has reached. The assessor then sorts each material into one of three outcomes: clean and disinfect it, remove and dispose of it, or leave it alone because it was never affected.
This guide explains how that reasoning works. It covers the paths contamination tends to follow, how different rooms and materials change the picture, the general kinds of tools used, and how the findings become a written scope you can read and question. It is meant to help you understand what you will see during a walk-through, not to turn you into an inspector.
If you are reading this after someone you love has died, you do not need to understand every detail today. The people doing the assessment can carry the technical side.
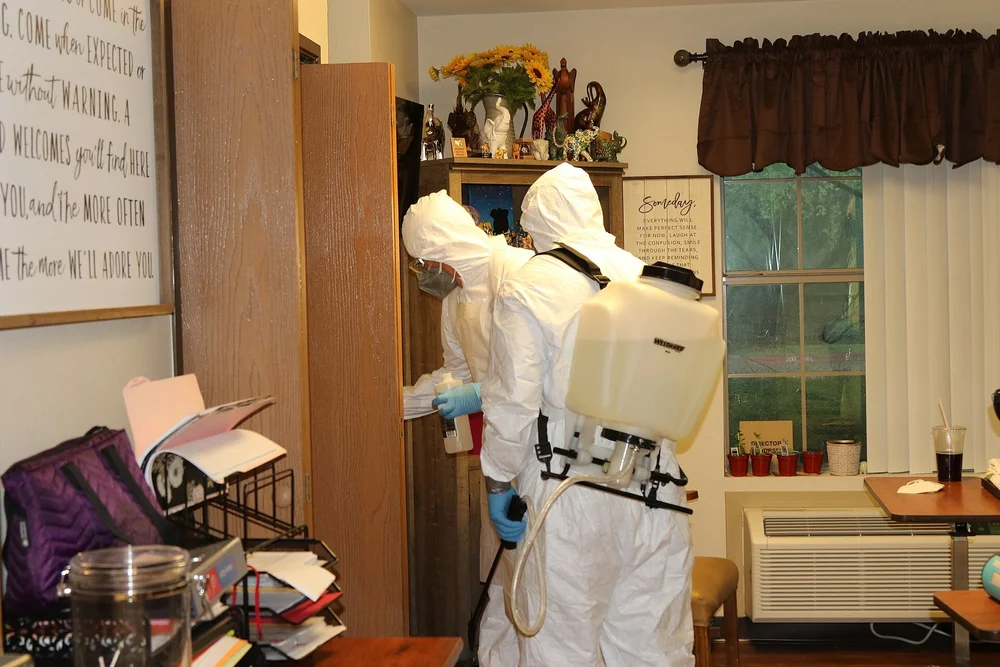
Photo: The National Guard, public domain, via Wikimedia Commons
What a room-by-room assessment is trying to answer
Every assessment comes back to a few plain questions. Where did biological material go? Which surfaces and objects did it touch? Can each of those be made safe again, or does it have to be removed? And what does the rest of the property need, if anything, so that people can use it normally afterward?
Answering those questions well matters for three reasons. The first is health. The CDC notes that bloodborne pathogens such as hepatitis B, hepatitis C and HIV can spread through contact with infected blood, so contamination that is missed is contamination someone might later touch. The second is cost. A scope that is too narrow leaves problems behind, and a scope that is too broad removes materials that could have stayed. The third is trust. When you can see why a carpet section is coming out and why the chair next to it is not, the work makes sense to you, and you can explain it to a landlord, a family member or an insurer.
This is the same thinking described more broadly in how a professional biohazard assessment works. This guide goes one level deeper, into the room and the material.
Starting at the point of origin and working outward
Assessors usually begin where the incident happened and move outward in widening rings. The point of origin tends to carry the heaviest contamination, and every path away from it is a possible route for material to have traveled.
Confirm the scene is released
No assessment starts until police and, where involved, the medical examiner have finished and released the property. If anyone is hurt or in danger, 911 comes first.
Locate the primary area
The assessor identifies where the incident occurred and marks the visible boundary of the affected area. That boundary is a starting estimate, not the final answer.
Check the immediate ring
Nearby furniture, walls up to a reasonable height, baseboards, door frames, light switches and the floor beyond the visible edge are examined, because the visible edge is rarely the true edge.
Follow traffic and handling paths
Doorways, hallways and routes that responders, family members or pets used are checked for anything carried on shoes, equipment or paws.
Look down and under
Floor coverings, pads, subfloors and the undersides of furniture are checked where liquid may have moved below what you can see.
Confirm what is unaffected
Finally the assessor marks which rooms and items show no sign of contact. Saying clearly what does not need work is as useful as listing what does.
On larger scenes this sequence repeats for each affected room, which is why projects that span several spaces are described separately in our guide to multi-room biohazard cleanup.
How biological material travels: the paths assessors look for
Liquids do not stay where they land. Much of an assessor's skill is knowing the routes that fluids, and the residue they leave, commonly follow inside a building. These are the main ones.
Gravity and the low point
Liquid runs toward the lowest point it can reach. On a slightly uneven floor that may be a corner, the edge along a wall, or a gap under a cabinet. Assessors pay attention to how a floor slopes, even when the slope is too small to notice by eye.
Wicking through soft materials
Fabric, foam, carpet fibers, padding and unsealed wood draw liquid sideways and downward the way a paper towel does. A small visible mark on a carpet surface can sit above a much wider area of affected pad underneath.
Seams, joints and gaps
The joint between floor and wall, the seams between planks or tiles, grout lines, the gap under a door threshold and the edge of a vanity are all openings. Liquid that finds a seam can reach the layer below.
Tracking and transfer
People, equipment and animals move residue from one place to another. First responders do necessary work and are not expected to protect flooring, so hallways and exit routes are routinely checked. Pets are another common source of transfer.
Items that were moved
Objects are sometimes shifted during an emergency or an investigation. A rug moved to the side, a chair pushed into another room or bedding gathered up can each carry contamination somewhere new.
Air movement
Airborne droplets and odor follow air currents. Assessors note where supply vents and return grilles are, whether a fan or HVAC system was running, and whether doors were open or closed. Odor is discussed in its own guide on biohazard remediation and odor concerns.
Sorting materials by how they hold contamination
Once the extent is mapped, each affected item and surface is sorted by how it behaves. The key property is porosity: whether a material lets liquid soak in, or keeps it on the surface where it can be reached and disinfected.
| Category | Common examples | Usual direction |
|---|---|---|
| Non-porous | Sealed tile, glass, metal, many plastics, finished countertops, porcelain fixtures | Often cleaned and disinfected in place |
| Semi-porous | Sealed hardwood, laminate, painted drywall surfaces, some vinyl, finished furniture | Depends on how long contact lasted, whether seams were reached, and the condition of the finish |
| Porous | Carpet and pad, mattresses, upholstery, unfinished wood, ceiling tiles, unsealed grout, drywall paper and core where soaked | Frequently removed when soaked through, because the inside cannot be reliably reached |
The category is only a starting point. A non-porous tile floor can still need grout or underlayment work if liquid reached the joints. A painted wall can often be cleaned, unless liquid ran behind the baseboard. The reasoning that decides between cleaning and removal is explained in detail in how professionals determine whether materials can be remediated, and what happens to the items that do come out is covered in what happens to contaminated porous materials.
The OSHA Bloodborne Pathogens Standard uses the term "contaminated" for the presence, or the reasonably anticipated presence, of blood or other potentially infectious materials on an item or surface. That phrase, reasonably anticipated, is a useful way to think about assessment. It is not only about what you can see. It is also about where contamination can reasonably be expected given how liquids and people move.
How different rooms change the assessment
The same incident creates different work depending on the room. Here are the patterns assessors keep in mind for common spaces.
Bedrooms
Bedrooms tend to hold the most porous material in a home: mattress, box spring, bedding, carpet, upholstered headboards, clothing and soft furnishings. Contact with a mattress usually means the mattress is assessed for removal, and the carpet and pad beneath the bed are checked even when the bed frame looks unaffected.
Bathrooms
Bathrooms have many hard, cleanable surfaces, which helps. They also have many seams: grout, caulk lines around tubs and toilets, the base of the vanity, and the toilet's wax ring area. Liquid that gets behind caulk or into grout can reach the subfloor, so these joints receive close attention.
Kitchens
Cabinet toe-kicks, the space under appliances and the joint between cabinets and floor are typical places for liquid to settle unseen. Food, open packages and items stored in affected areas are generally discarded rather than cleaned.
Living rooms
Sofas and recliners are the main concern. Upholstered furniture has foam cushions, internal padding and a wooden frame, all of which can absorb. Assessors also check underneath, because liquid can pass through and reach the floor below.
Stairs and hallways
Carpeted stairs combine porous materials with tack strips and edge joints on every step, and they are part of the main route in and out of the home. They are frequently inspected even when the incident happened elsewhere.
Garages, basements and outbuildings
Bare concrete looks hard but is porous. Liquid can soak into unsealed concrete, and assessors will say whether cleaning is likely to be enough or whether more is needed. Stored belongings in boxes are checked individually.
Vehicles
A vehicle is its own assessment, with seats, headliners, carpet, seat belts and ventilation systems in a small enclosed space. See vehicle biohazard cleanup for how that work is approached.
The kinds of tools used during an inspection
You may notice the assessor using a handful of tools. None of them replaces judgment, and different companies use different equipment, but the general types are similar.
- Strong, angled lighting. A bright light held low across a surface shows residue, staining and texture changes that overhead lighting hides.
- Moisture meters. These indicate whether a material such as drywall, wood or subfloor is holding more moisture than nearby areas. They help show where liquid traveled inside a material, though they do not identify what the liquid was.
- Hand tools for looking underneath. Lifting a carpet corner, pulling back a section of baseboard or removing a vent cover lets the assessor see the layer below. This is usually done carefully and only where needed, and you will normally be told before anything is opened up.
- Cameras. Photos record the condition of each area before work starts. They support the written scope and can be given to you for your insurer.
- Measuring tools. Tape measures or laser measures record the size of affected areas so that the scope reflects real square footage rather than guesses.
- Personal protective equipment. Gloves and other protective gear are worn during the inspection itself, as covered in our guide to cleanup equipment and PPE.
Some companies also use surface tests that detect organic residue, such as adenosine triphosphate (ATP) readers, mostly to check results after cleaning. Hospitals use tools like these and fluorescent markers to monitor routine cleaning, and published research has compared them. They can be helpful indicators, but they are not a substitute for careful visual inspection and sound decisions about porous materials.
Looking beneath the surface: floors and walls in layers
Most of the work you cannot see during an assessment happens in the layers of a floor or wall. Understanding those layers makes the scope easier to follow.
A typical carpeted floor
Starting at the surface and moving down, there is the carpet face, the carpet backing, the pad, the tack strip around the edges, and the subfloor, which is commonly plywood or oriented strand board in a wood-framed home, or concrete in a slab home. Each layer can be affected or unaffected independently. A careful assessment states which layers are involved in each area. Our page on blood in carpet and subfloor cleanup explains how that work is carried out.
Hard flooring
Laminate and engineered planks have joints where liquid can pass through to an underlayment. Sheet vinyl may trap liquid beneath it. Tile is hard, but grout and the bed it is set in may not be.
Walls
Painted drywall surfaces can often be cleaned when contact was light. If liquid ran down behind a baseboard or soaked into the paper face and core, a section of drywall may be removed. Assessors look at the bottom edge of walls carefully for this reason. Opening a wall is a decision that the assessor will discuss with you first.
When removal reaches structural layers, the property usually needs repairs afterward. Those repairs are generally a contractor's work. The handoff between cleanup and rebuilding is explained in biohazard cleanup versus standard restoration.
What the assessor writes down
A good assessment produces records, not just impressions. You should expect the findings to be written in a way you can follow later.
- Each affected room named, with the affected areas described in plain terms
- Approximate measurements of affected flooring, wall sections and other surfaces
- A list of items recommended for removal, and a note of items that can be cleaned
- Photos of each area before work begins
- Notes about access, such as stairs, parking, elevators or gated entry, that affect how work is done
- Any points that could not be confirmed until materials are opened, flagged as possible changes
That last point matters. Sometimes the full extent only becomes clear once a carpet is lifted or a baseboard comes off. An honest scope says so up front instead of surprising you later. If the scope needs to change, you should hear why and see what was found. More on keeping these records is in understanding documentation in biohazard remediation, and property managers may also find what property managers should document before remediation useful.
What you can tell the assessor that helps
You do not need to stay in the affected rooms during an assessment, and many people choose not to. A short conversation beforehand, or a phone call, can still save time and help the assessor see the full picture.
- What you know about the timeline. Roughly how long before the incident was discovered, if you know. Longer periods usually mean deeper migration into materials.
- Whether the heating or cooling system was running. This helps the assessor decide how closely to check vents and returns.
- Who walked through the property afterward. Family, neighbors, responders and pets can all carry residue along their routes.
- Anything that was moved or removed. If a rug, bedding or a piece of furniture was moved, say where it went.
- Items that matter to you. Photographs, papers, heirlooms and keepsakes can be flagged so that they are handled with care and set aside for a decision rather than discarded.
- Your insurer, if you have one. If you plan to contact an insurer, mention it so photos and notes are organized with that in mind.
If you have not yet called, our guide on what not to do before a biohazard cleanup assessment lists simple, safe steps, such as keeping people and pets out and closing the door.
Common misreadings of an affected room
Families and property owners often reach conclusions about a room that feel sensible but turn out to be incomplete. These are the ones that come up most.
What it can look like
- The stain is small, so the problem is small
- The surface looks clean after wiping, so it is clean
- There is no odor in the next room, so it is unaffected
- The floor is tile, so nothing went below it
- A strong cleaning smell means the room was disinfected
What an assessor considers
- Porous layers below can hold far more than the surface shows
- Wiping can spread residue and leave material in seams and pores
- Odor depends on air movement, doors and time, not only on contamination
- Grout, joints and edges can let liquid through
- Disinfection depends on the right product, used correctly, on a cleaned surface
The last point reflects public-health guidance. The CDC's environmental infection control guidance describes cleaning as the necessary first step before disinfection, because organic matter interferes with disinfectants, and it advises removing most organic matter from a large spill before final disinfection. That is one reason household attempts often fall short, a topic covered in understanding the limits of household cleaning.
Turning findings into a written scope and estimate
After the walk-through, the findings are turned into a written scope. That document describes which areas will be cleaned and disinfected, which materials will be removed, how waste will be handled, and any areas left out of the work. The price is based on that scope.
Several factors from the assessment usually shape it: how many rooms are involved, how much porous material needs removal, which layers are affected, how much waste will be produced, and how easy the property is to work in. There is no fixed price per room, because two rooms of the same size can need very different work. Our page on how pricing works and the guide to evaluating a biohazard cleanup quote explain what to look for.
If you need to arrange work quickly, the Order Online page takes a $2,000 initial deposit. That deposit is not the final price, and paying it is not a promise that work begins by any particular time. The final amount still comes from the written scope after assessment. For insurance, we can provide photos, the written scope and an itemized invoice to give your insurer. Whether a policy covers any of the work depends entirely on the policy and the insurer.
Key points to take from this guide
A room assessment is a structured search. It begins where the incident happened, follows the paths that liquids, people and air take, and checks every layer that could hold contamination. Each material is then sorted by how it behaves: hard surfaces are usually cleaned, soaked porous materials are usually removed, and unaffected areas are left alone and noted as such.
You can expect to see lights, meters, cameras and measuring tools, and you can expect a written record that you are able to follow. Where something cannot be confirmed until materials are opened, a good scope says so. Your knowledge of the timeline, anything moved and the items that matter to you makes the assessment more accurate.
Nashville 24/7 Biohazard Disposals assesses properties across Middle Tennessee from our Nashville base. To talk through a situation or arrange an assessment, call (615) 513-5112 any time, or use our contact page. For the broader picture of our services, see biohazard cleanup services.
Questions people ask
How long does a room-by-room assessment usually take?
It depends on the size of the property, how many rooms are involved and how much needs to be checked beneath the surface. A single affected room is quicker to assess than a whole house where material was carried from room to room. The assessor can give you a rough idea once they see the property.
Will the assessor cut into walls or pull up carpet during the visit?
Sometimes a small amount of lifting or opening is needed to see a hidden layer, such as a carpet corner or a short run of baseboard. This should be discussed with you first. Larger removal is part of the cleanup work itself and is described in the written scope before it starts.
Why are rooms where nothing happened sometimes included?
Because people, pets and equipment move between rooms, and air carries odor. A hallway or adjoining room may be checked to confirm whether it was affected. If it was not, a good assessment says so clearly and leaves it out of the scope.
Can the assessment tell exactly what is in a stain?
A visual and moisture-based assessment shows where liquid traveled and which materials are affected. It is not a laboratory analysis. Where blood or other potentially infectious material is present or reasonably expected, the area is treated accordingly.
Do I need to be at the property during the assessment?
Not necessarily. Someone needs to authorize access, and a short conversation about what you know is helpful, but you can stay outside or away from the affected areas. Many people prefer to talk by phone and let the assessor walk through alone.
What if more contamination is found after work starts?
It can happen, especially below flooring or behind baseboards. When it does, you should be told what was found, shown photos, and asked before the scope changes. Unexpected findings should be explained, not simply added to the bill.
Is a room assessment different for a rental unit or apartment?
The technical reasoning is the same, but more people are usually involved, including owners, managers and sometimes neighbors in shared buildings. Shared walls, common hallways and building ventilation can add areas to check. See apartment biohazard cleanup for that setting.
Sources
Have someone walk the rooms with you
If you are unsure how far contamination reached, an assessment gives you clear answers and a written scope. Call (615) 513-5112 any time to arrange one.